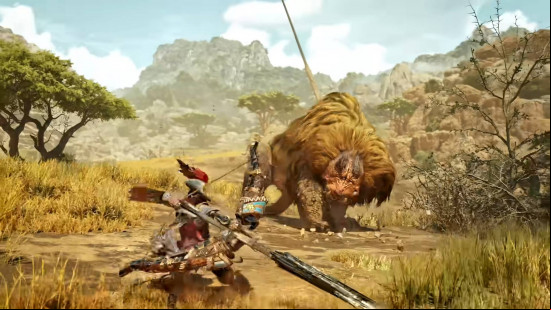
What is the best Monster Hunter Wilds Bow build? The Bow returns in Wilds, and is one of the Monster Hunter weapons that has received the biggest changes, making it more accessible to new players, that's if you're able to manage your stamina and you like mid to long range combat, with the occasional close-range monster dodge.
The Bow doesn't require any ammo management, making it a great option over similar MH Wilds Bowgun, but it does require you to keep an eye on your stamina as well as effectively manage a new trick arrow gauge. The best Monster Hunter Wilds Bow build should see you switching between shot types and using your trick arrow gauge to land killer blows.
Best Monster Hunter Wilds Bow build
The best build for the Bow is:
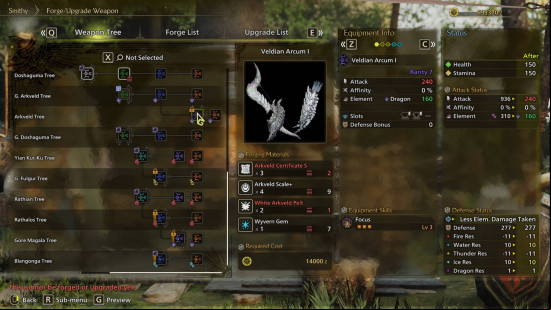
- Primary Weapon: Renowned Tristram (Bow)
- Secondary Weapon: Inspired Ywain (Dual Blades)
- Armor: G. Arkveld Helm A, G. Arkveld Vambraces B, Gore Mail B, Rathalos Coil A, Rathalos Greaves B
- Decorations: Precise Jewel III (Primary), Trueshot Jewel II (Primary), Attack Jewel I (Primary), Expert Jewel III (Secondary), Expert Jewel II (Secondary), Razor Sharp I (Secondary), x3 Protection Jewel I, x3 Physique Jewel, Jumping Jewel II, x2 Flayer Jewel III
- Talisman: Counterattack Charm
- Mantle: Evasion Mantle
- Equipment Skills: Focus (Lv. 3), Partbreaker (Lv. 2), Flayer (Lv. 3), Weakness Exploit (Lv. 2), Evade Window (Lv. 2), Adrenaline Rush (Lv. 2), Evade Window (Lv. 3), Divine Blessing (Lv. 3), Constitution (Lv. 3), Evade Extender (Lv. 2), Ballistics (Lv. 3), Special Ammo Boost (Lv. 2), Critical Eye (Lv. 5), Razor Sharp (Lv. 1)
The best Bow build focuses on dealing as much damage as possible, rather than peppering an enemy with a specific element or status condition. The Renowned Tristram is a Rarity 8 Bow that deals significant Dragon damage along with a high base attack. It comes with Focus (Lv. 3), allowing you to charge up your Trick Arrow gauge quickly to use Tracer Shot and Pierce Coatings.
The speed and mobility of the MH Wilds Dual Blades works well with the best Bow build's armor set, so we've gone for the Inspired Ywain as the ideal secondary weapon. Like the Renowned Tristram, it comes with Focus (Lv. 3), so whenever you're forced into close-ranged melee, you can fill the Archdemon Mode as quickly as possible, then disengage to switch back to your Bow.
The best armor set for the Bow is a mix of G. Arkveld, Gore, and Rathalos. These take advantage of the Bow's pinpoint accuracy with a combination of Flayer and Partbreaker skills, letting you tear open wounds and break off monster parts more easily. This combines with Weakness Exploit to boost the affinity of those attacks. We've incorporated Evade Window to keep you light on your feet and also trigger Charging Sidestep more often. A well-timed dash triggers Adrenaline Rush, temporarily buffing your attack power.
There's a ton of decoration slots for the best Bow build, and we've stacked them high with skills that boost mobility and damage. Precise Jewel III gets socketed into Renowned Tristram to fully extend the range of your projectile attack power, while Trueshot Jewel II delivers an attack buff to your stronger moves. Meanwhile, Inspired Ywain is empowered with Expert Jewell III and Expert Jewel II for an affinity boost alongside the Razor Sharp Jewel, so whenever you swap to it, you can rely on it to hit hard and stay sharp.
Bow s are naturally a little squishy, so we've plugged the tier-one armor decoration slots with Protection Jewels for Divine Blessing's halved damage reduction. Physique Jewels deliver Constitution to reduce stamina reduction while evading, paired with Jumping Jewel II for Evade Extender. Finally, two Flayer Jewels top up the initial pip of Flayer provided by your armor, so you can tear open wounds with the best of them.
Finally, we've rounded off this best Bow build with the Counterattack Charm talisman and Evasion Mantle, both of which grant bonuses for perfectly dodging monster attacks.

How to use the Monster Hunter Wilds Bow
The Bow's update in Wilds means it has more varied playstyle and combat options for new and returning players, and if you're set on using the Bow, you can always choose stamina skills to help you manage this better in combat. Quick shots, however, don't use any stamina, and there are ways to recharge your stamina in combat that require a well-timed dodge.
You also want to maintain a critical distance with the Bow, where you're not too far away or not too close to the monster you're attacking; this is denoted by the reticle turning orange if you're within ideal range. If you're not, the reticle is white and you do much less damage.
You can charge up most shots, including the regular shot and quick shot. These two basic attacks increase the amount of arrows fired up to three total, and you can consistently keep firing three arrows by dodging while aiming.
The trick arrow gauge can be used to fire special arrows such as coatings and tracer arrows. Tracer arrows consume some of the trick gauge, but allow shots that home in on a targeted area, and detonate after enough time has ed or enough damage has been dealt. It also allows longer range, furthering critical distance, and is great to use in combo with other attacks such as quickshot, coating shots, or spread, as they're guaranteed to hit.
All Bow coatings:
- Power coating
- Close-range coating
- Piercing coating
- Poison coating
- Paralysis coating
- Sleep coating
- Blast coating
- Exhaust coating
The gauge itself is a small bar found on the righthand side of the screen, divided into three sections, with each section consumed, eight coating arrows or tracer arrows are loaded into your Bow. The trick is, you need to keep this topped up, so you're able to constantly land combos, and fortunately there are a few ways to keep this trick gauge up. You can earn trick gauge by attacking, dodging, and charging.
The trick gauge is the center of how combos can be used to effectively target and weaken monsters. The arc shot, for example, leaves lingering bomb arrows behind on an enemy that always land if tracer arrows are used, and bombs can quickly be dealt with using Dragon Piercer to set them off.

Monster Hunter Wilds Bow moveset
Here are all the moves and combos for the Bow:
- Charging Sidestep: While aiming, dodge just before a monster attacks to regain stamina.
- Flying Shot: Leap into the air and fire a shot after a Charging Sidestep.
- Arc Shot: Fire arrows into the sky that rain down on a monster, can be charged up to three levels to increase the amount of bomb arrows left behind.
- Instant Dragon Piercer: Half the ready time, does half the damage, but can be used to detonate bomb arrows.
- Thousand Dragons: Fires a volley of spread arrows that deal high damage, great paired with the bombs and tracer arrows.
- Hailstorm: A two-part focus strike, if a monster is wounded, aim the arrow at the wound or tracer arrow to launch a tracking arrow that hits multiple places on the monster. It can be charged up to three levels to increase the amount of arrows and unleash a follow up attack that deals damage to the wounds.
Now that you're caught up on how to use the Bow, we've got more of the best MH Wilds monsters you'll face along the way.
Additional contributions by Nat Smith.

